Top 5 Form Errors in Compound Lifts
Compound lifts like squats, bench presses, and deadlifts are powerful for building strength, but poor form can lead to injuries and stalled progress. Below are the five most common form mistakes and how to fix them:
- Loss of Bracing and Spinal Position: Failing to maintain core tension leads to unsafe spinal alignment. Solution: Use deep belly breaths and keep your torso stable throughout the lift.
- Poor Foot Pressure and Knee Tracking: Uneven foot pressure causes knee collapse (valgus), increasing injury risk. Solution: Distribute weight evenly across your foot and drive knees outward.
- Inefficient Bar Path: Incorrect bar movement shifts stress to joints. Solution: Maintain a straight bar path in deadlifts and a slight arc in bench presses.
- Lack of Upper-Back Engagement: Weak upper-back control destabilizes lifts. Solution: Retract and engage your shoulder blades to protect joints and improve stability.
- Poor Setup: Incorrect stance or bar positioning leads to compensations. Solution: Ensure proper bar placement, stance width, and footwear for stability.
Each error can compromise safety and performance, but small, consistent adjustments can make a big difference. Tools like CueForm AI can analyze your lifts and provide personalized feedback to improve your technique.
Deadlifts - 5 Most Common Deadlift Mistakes
1. Loss of Bracing and Spinal Position Under Load
This is one of the most common mistakes people make with the big three lifts. Bracing goes beyond just "tightening your abs" - it’s about creating consistent pressure throughout your core to stabilize your spine when lifting heavy. When this pressure gives out mid-rep, your body compensates, which can increase the chance of injury.
Take squats, for example. Losing your brace often leads to the dreaded "butt wink" - when your pelvis tucks under at the bottom of the movement, forcing your lower back into an unsafe position [6]. In deadlifts, a weak brace can cause your lower back to round. During the bench press, it shows up as flared ribs and a collapsed arch, which shifts stress away from the chest and upper back and onto the shoulders.
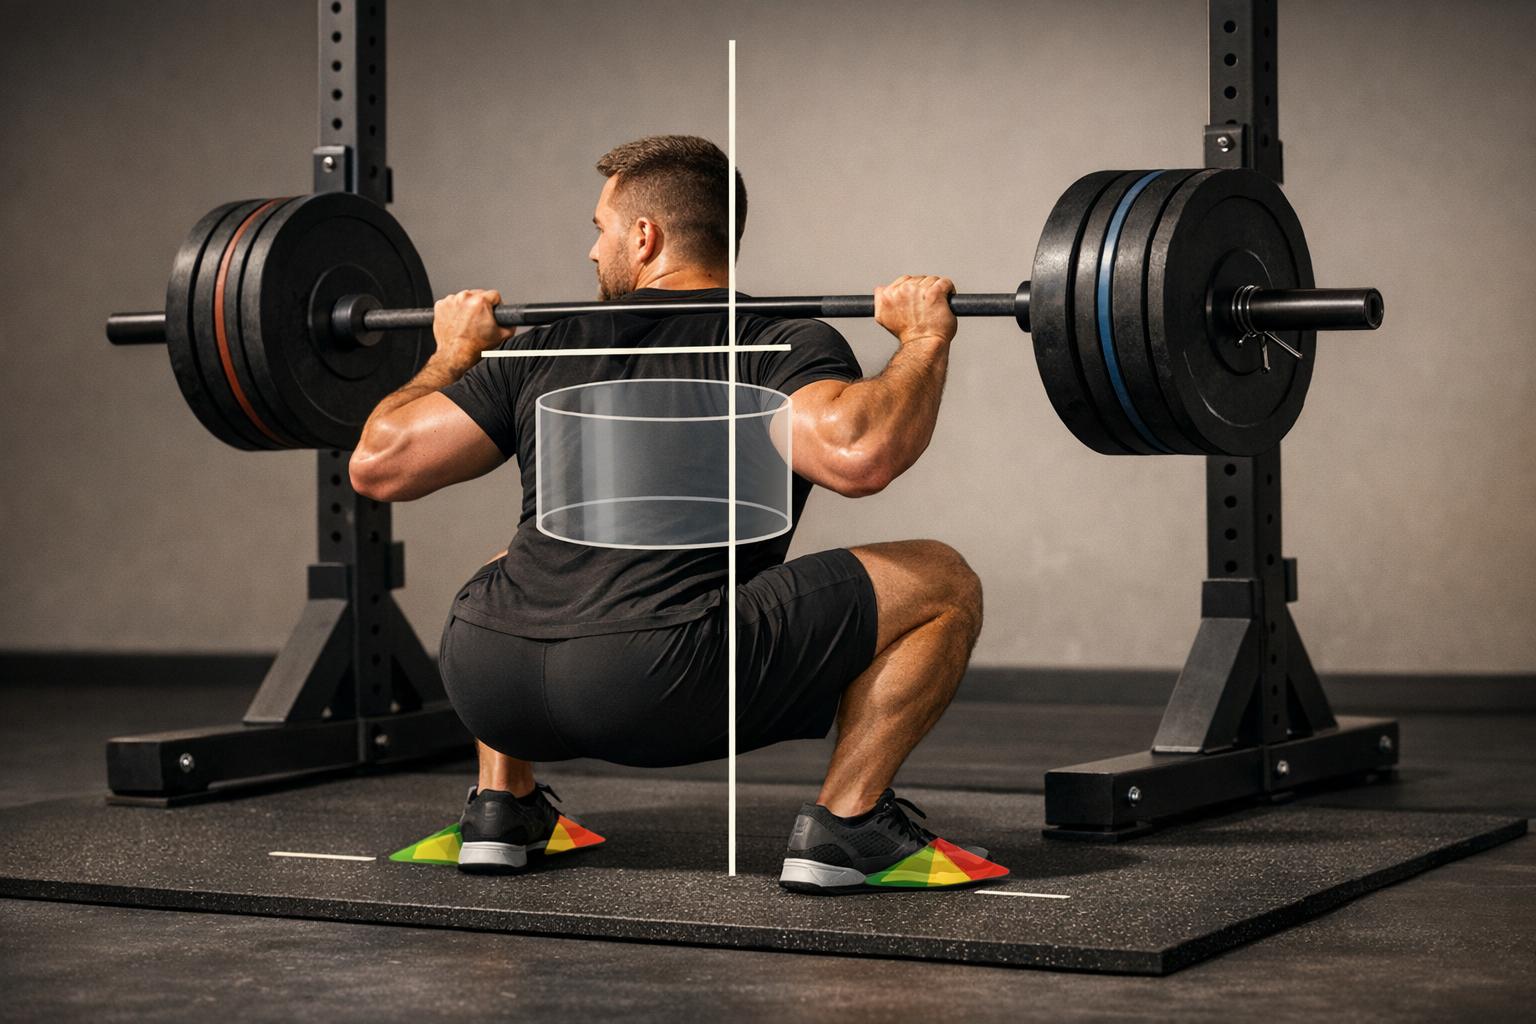
"Most 'form breakdown' is really 'brace breakdown.' When your torso can't act like a solid cylinder, your body starts making side deals." - Fitsse [7]
Studies highlight the importance of bracing: it can cut injury risk by more than 60% and boost muscle activation by up to 40% compared to lifting without proper bracing [5]. A weak brace isn’t just dangerous - it also limits your strength potential.
To fix this, take a deep breath into your belly and sides before starting your lift, and hold that pressure throughout the movement. Avoid breathing into your chest. A helpful cue is to think "ribs down, belt buckle up", visualizing your torso as a solid, unyielding cylinder. Want a drill to practice? Stand tall, exhale completely, then inhale deeply into your sides. Perform a slow bodyweight squat while maintaining that pressure from start to finish.
If you’re not sure whether your brace is holding during your lifts, tools like CueForm AI can analyze your form and pinpoint the exact moments where your spinal position falters - so you can address the issue with precision.
Next, let’s look at how improper foot pressure and knee tracking in squats can further disrupt your mechanics.
2. Poor Foot Pressure and Knee Tracking in Squats
Once your brace or core stability falters, the next weak link often shows up in your feet and knees. These two areas are key to controlling how your knees move. When alignment goes off here, your entire lower body can lose coordination.
One of the most noticeable signs of this issue is knee cave (genu valgus) - when your knees collapse inward as you lower into or push out of a squat. This isn’t just about form looking off. A study published in April 2026 by PoinT GO Research found that repeated knee cave during squats can lead to a 1.7x higher risk of knee injuries within a year if not corrected [2]. As researchers Slater and Hart explain:
"A poorly performed squat may result in altered lower extremity alignment such as increased knee valgus which may expose the lower extremity joints to excessive torques." [3]
The main culprit? Uneven foot pressure. When your weight shifts too far forward, inward, or unevenly across your foot, it forces your knees to collapse. A helpful mental image is to think of your foot as a tripod - distribute your weight evenly across the heel, big toe, and pinky toe. Pair this with the cue “drive your knees out” to keep alignment on track.
Another factor that can throw off knee tracking is limited dorsiflexion (the ability to flex your ankle upward). If your ankles lack mobility, your heels might lift, or your torso might lean forward too much, both of which disrupt proper squat mechanics [8]. Including ankle mobility drills in your warm-up can help, especially if inward knee drift is a recurring problem at the bottom of your squat. Keeping even foot pressure and improving ankle mobility can go a long way in maintaining proper lower-body coordination.
Not sure if your knee tracking is on point? Tools like CueForm AI can analyze squat videos and highlight alignment issues for you.
3. Inefficient Bar Path in the Bench Press and Deadlift
An inefficient bar path can shift the load away from the intended muscles and place unnecessary stress on vulnerable joints.
In the bench press, one common mistake is pressing the bar in a perfectly vertical line. This approach often increases stress on the shoulders. As the Genghis Fitness editorial team explains:
"The intuitive bar path for the bench press is straight down to the mid-chest and straight back up. This is mechanically inefficient and places the shoulder joint in an impingement-prone position." [9]
Instead, a slight diagonal "J-curve" - where the bar descends to the lower chest and presses upward - has been shown to be more effective. Research from the Journal of Strength and Conditioning Research highlights that elite bench pressers consistently use this curved bar path. This technique not only generates higher force output but also reduces joint stress compared to the straight vertical path often seen in beginners [9]. A helpful cue for achieving this path is to think of "pushing away from the bar" as you press, which naturally guides the bar along the proper trajectory [11].
While the bench press benefits from a curved bar path, the deadlift requires a completely different approach.
In the deadlift, efficiency hinges on maintaining a straight vertical bar path over the mid-foot. Any forward or backward drift can make the lift much harder. Jake Dickson, NASM-CPT, emphasizes this point: "The most efficient way to [deadlift] is to move it in a straight line, period. If it somehow looks more like a row, with unwanted forward or backward movement, something is undoubtedly wrong." [10] Bar drift often signals that your shoulders are positioned too far forward. To fix this, focus on keeping the bar in contact with your legs throughout the lift [5].
Using a side-view camera can be an excellent way to spot these issues. For the deadlift, the bar should move in a straight line; for the bench press, you should notice a slight arc. Tools like CueForm AI can analyze your lifting videos, identify bar path drift, and provide targeted cues to help correct your form before bad habits take hold.
sbb-itb-c91a623
4. Lack of Upper-Back Engagement and Shoulder Control
Weak upper-back engagement is often overlooked, but it’s a critical part of proper lifting form. When the upper back isn’t engaged, the kinetic chain breaks down, forcing other muscles to compensate. This not only reduces efficiency but also increases the risk of injury.
Upper-back control does more than just stabilize your lift - it directly impacts performance. For example, in the bench press, failing to retract your scapulae can cause your shoulders to roll forward and your elbows to flare too far out, exceeding the safe range of 45° to 75°. In the deadlift, a disengaged upper back often results in passive thoracic rounding. If thoracic flexion exceeds 15°, it can increase shear stress on your spinal discs by 4 to 6 times compared to a neutral spine lift [14]. In the squat, poor upper-back engagement can lead to a "good morning" collapse, where the chest drops, and the torso tilts forward under the load [13][15].
As one expert explains:
"Scapular retraction... will help reduce range of motion by pushing the chest up, and it'll also put the shoulders in a safer position to reduce your risk of rotator cuff injuries or anterior shoulder pain." [12]
To address this, use specific cues for each lift. In the bench press, think "pinch your shoulder blades together" to maintain scapular retraction throughout every rep. For the deadlift, focus on pulling the bar into your body to engage your lats - this helps reduce thoracic rounding and keeps your spine in a safer position [9][14].
A helpful tip is to record your lifts and review the footage to spot any upper-back breakdowns. Tools like CueForm AI can analyze your squat, bench press, or deadlift videos, identifying upper-back issues and providing tailored cues to fix them. This ensures you build strong habits and maintain consistent upper-back engagement across all compound lifts.
5. Poor Bar and Stance Setup Leading to Compensation
Many form issues in lifting can be traced back to how you set up initially. A poor setup creates imbalances that only get worse as the lift continues.
In the deadlift, setup mistakes are especially critical. Studies indicate that about 90% of deadlift-related back injuries occur during the setup phase - before the bar even leaves the floor [16]. Those few seconds of gripping the bar determine spinal alignment, lat engagement, and foot pressure patterns [16]. A common error is bar placement: if the bar is too far from your shins, your hips drop too low, turning the movement into more of a squat [17]. On the flip side, if the bar is too close, your hips rise too high, forcing your back into a horizontal position and increasing stress on your lower back [19]. The solution? Place the bar directly over your mid-foot (about 1 inch from your shins) and lower your hips just enough for your shins to touch the bar.
The squat also demands precise setup. A stance that doesn’t align with your hip structure can cause your body to compensate, often through pelvic tilting, to reach depth [6]. A good starting point is standing with your heels shoulder-width apart and your toes angled outward about 15–30°. This allows your hips to move naturally between your legs [20][21]. As you descend, unlock your hips and knees at the same time instead of sitting back first. This keeps the bar aligned over your mid-foot and prevents your hips from shooting up too quickly [6].
For the bench press, even the rack height matters. If the bar is set too high, it forces your shoulder blades to protract during the unrack, compromising scapular stability. Position yourself so your eyes are directly under the bar, ensuring a smoother unrack without disrupting shoulder alignment [12][13]. Grip placement is equally important. If the bar sits too high in your palm, your wrists cock backward, increasing strain on the joint and reducing your ability to generate force [12]. Instead, grip the bar closer to the heel of your hand, aligning the load directly over your forearm bones.
Footwear also plays a crucial role across all three lifts. Soft-soled running shoes can lead to unwanted weight shifts, throwing off your balance. Firm, flat-soled shoes - or even lifting in socks on a solid surface - offer a more stable base [18].
Every detail, from bar positioning to footwear, sets the stage for a safe and efficient lift. Tools like CueForm AI can help identify setup flaws in your squat, bench press, or deadlift before they lead to bigger problems.
Comparison Table
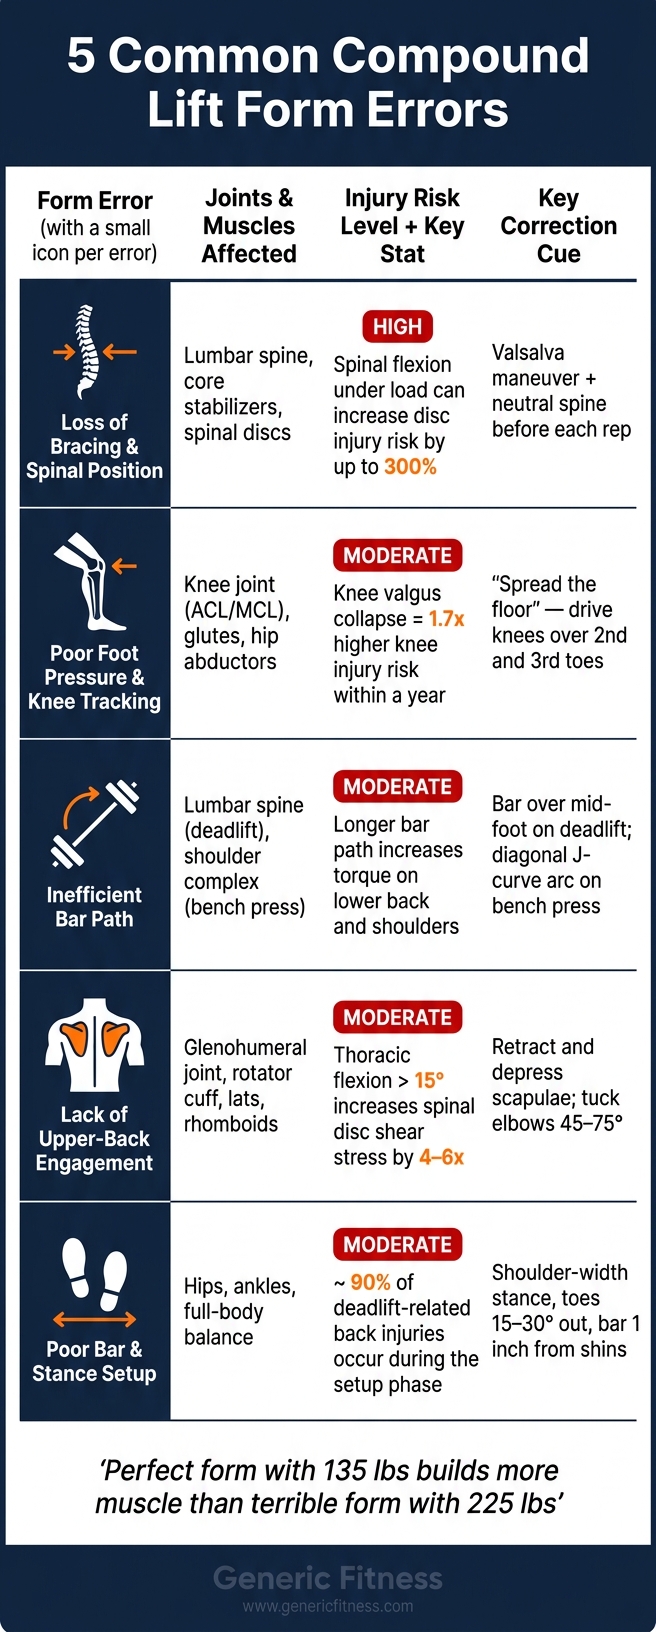
5 Common Compound Lift Form Errors: Mistakes, Risks & Fixes
The table below outlines common form errors, their effects on key joints and muscles, and the recommended corrections. Each mistake can impact performance and increase the risk of injury, so addressing these issues is crucial for safer, more effective lifting.
| Form Error | Joints & Muscles Affected | Impact on Performance & Injury Risk | Key Correction |
|---|---|---|---|
| Loss of Bracing & Spinal Position | Lumbar spine, core stabilizers, spinal discs | High risk: Spinal flexion under load can increase disc injury risk by up to 300% [25]. It also disrupts force transfer through the kinetic chain [13]. | Use the Valsalva maneuver; brace your core before each rep; maintain a neutral spine [13]. |
| Poor Foot Pressure & Knee Tracking | Knee joint (ACL/MCL), glutes, hip abductors | Moderate risk: Knee valgus collapse puts significant strain on the knee joint [24] and reduces glute activation and hip power [1]. | Focus on "spreading the floor" and drive your knees over the second and third toes [1][5]. |
| Inefficient Bar Path | Lumbar spine (deadlift), shoulder complex (bench press) | Moderate risk: A longer bar path increases torque on the lower back and shoulders [25], making the weight feel heavier [1]. | Keep the bar over your mid-foot; "shave the legs" on deadlifts; use a diagonal arc on the bench press [23][25]. |
| Lack of Upper-Back Engagement | Glenohumeral joint, rotator cuff, lats, rhomboids | Moderate risk: Poor upper-back engagement leads to an unstable shoulder platform [1], increasing the risk of rotator cuff and anterior shoulder strain [12]. | Retract and depress your scapulae; tuck elbows at 45–75°; use the "protect your armpits" cue on deadlifts [1][12]. |
| Poor Bar & Stance Setup | Hips, ankles, full-body balance | Moderate risk: Improper setup can cause compensation patterns. Forward lean shifts load to the lower back [6], and early hip rise adds to this risk [1]. | Set a shoulder-width stance (toes angled 15–30° out); position the bar about 1 inch from your shins [1][22]. |
Correcting these errors not only protects you from injuries but also enhances muscle activation and overall performance [5].
"Perfect form with 135 pounds builds more muscle and strength than terrible form with 225 pounds." - Motiweights [1]
If you're unsure about your own form, consider recording your sets for review. Tools like CueForm AI can analyze your squat, bench press, and deadlift videos, providing specific feedback to help you identify and address these issues.
Conclusion
The comparisons above highlight how even small mistakes in form can lead to big problems. Issues like loss of bracing, poor knee tracking, inefficient bar path, weak upper-back engagement, and a faulty setup all share one thing in common: they shift stress away from active muscles and onto vulnerable areas like joints, ligaments, and spinal discs. Physical therapist Jeffrey Ashurst explains it well:
"I find it common to see someone who's been lifting on their own for years to be very good at compensating and masking weaknesses. ... More often than not, they've developed really proficient workarounds for issues that otherwise would limit their capacity and performance." [4]
So, what’s a practical fix? Start by recording your lifts at lighter weights. Spend 4–6 weeks working at 50–60% of your max, focusing on a controlled 3-second descent and a 1-second ascent before adding more weight [13]. Use a side-angle video to check your spinal alignment and bar path, and a front-facing view to spot knee drift or uneven movement. What feels right might look wrong on video, so this step is crucial.
For a faster way to identify and correct errors, try tools like CueForm AI. It can analyze your videos for common issues like knee valgus or lumbar flexion. Plus, the Chat with coach AI feature lets you ask questions and fine-tune your technique with personalized cues. Over time, you can track your progress in both technique and load through measurable scores [2][26].
Improving your form isn’t a one-time fix - it’s a lifelong process. Building real strength means treating your movements with as much care as the weight you lift. Focusing on technique consistently is the best way to stay strong and avoid injury in the long run.
FAQs
How do I know if I’m bracing correctly?
To brace effectively, focus on creating 360-degree pressure around your midsection - this means engaging not just your abs, but also the sides and back of your core. Picture yourself preparing to take a punch to the stomach, expanding your core outward in all directions. Incorporating diaphragmatic breathing helps with this process. By filling your torso with air, you generate internal pressure, which acts like a natural weight belt to stabilize your spine. For tailored guidance, CueForm AI offers personalized feedback to refine your bracing technique and enhance core stability.
What should I fix first if my form breaks down?
If your form starts to falter, take a step back. Reduce the weight, slow down your tempo, or limit your range of motion to regain control. Pay close attention to your setup - make sure your feet, spine, and shoulders are aligned correctly before every rep. Recording your lifts or using tools like CueForm AI can help identify where things are going wrong and offer practical tips to improve your movement.
Which camera angles best show squat, bench, and deadlift errors?
To effectively record squat, bench press, and deadlift movements, set up your camera to capture your entire body and full range of motion. Make sure the camera is steady and positioned in a well-lit area. Wearing clothing that contrasts with the background helps highlight your joint angles for better analysis. Once recorded, these videos can be reviewed using CueForm AI, which provides tailored feedback and practical technique tips.
Related Blog Posts
Plans
Choose the plan that best fits your needs.
Free
Try it out
Starter
Perfect for fitness enthusiasts